
Process
Making a Ring From Start To Finish
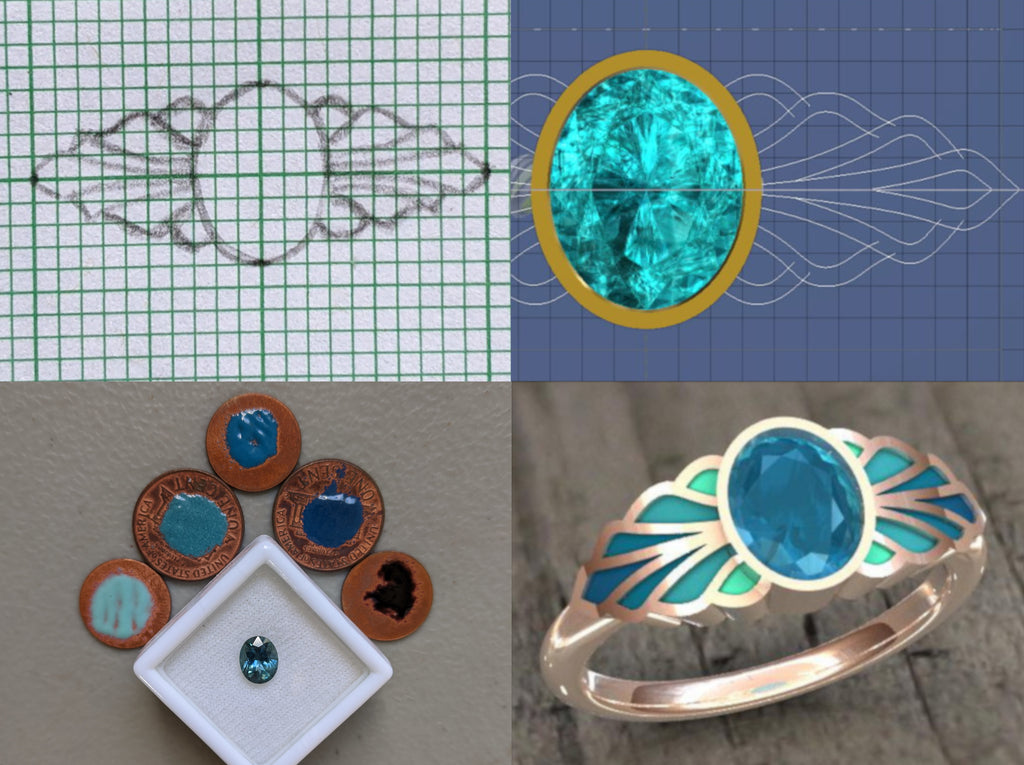
Planning the Project
I always begin my work with sketches. After working in pencil, I transfer my design to the computer, refining details as I go. The sketch becomes the basis for a 3D model of the ring that I use for casting. Next I play with my enamel samples to get a starting point for my color palette. Then, I create several different color renders on the computer model, visualizing what will look best.
Applying the Enamel
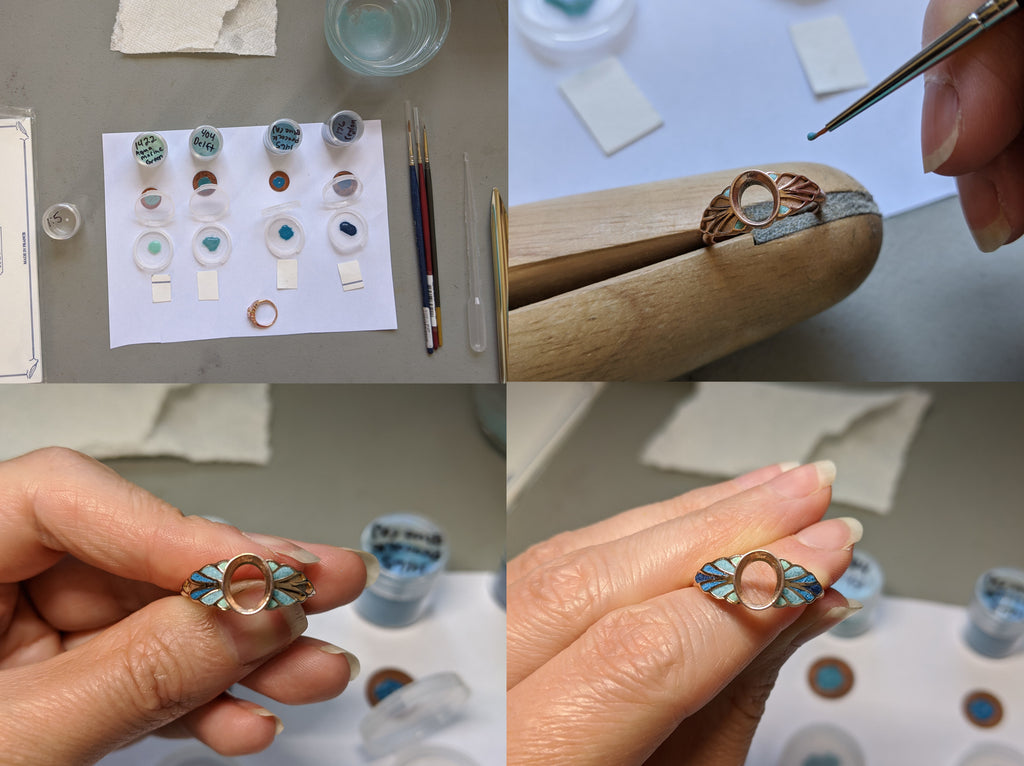
Once my ring arrives back from the casters and I've had a chance to clean it up, I can apply the enamel to the piece. I use traditional vitreous enamels, which start out looking like colored sand. I mix them with distilled water, and carefully apply them in each enamel area.
Firing the Enamel
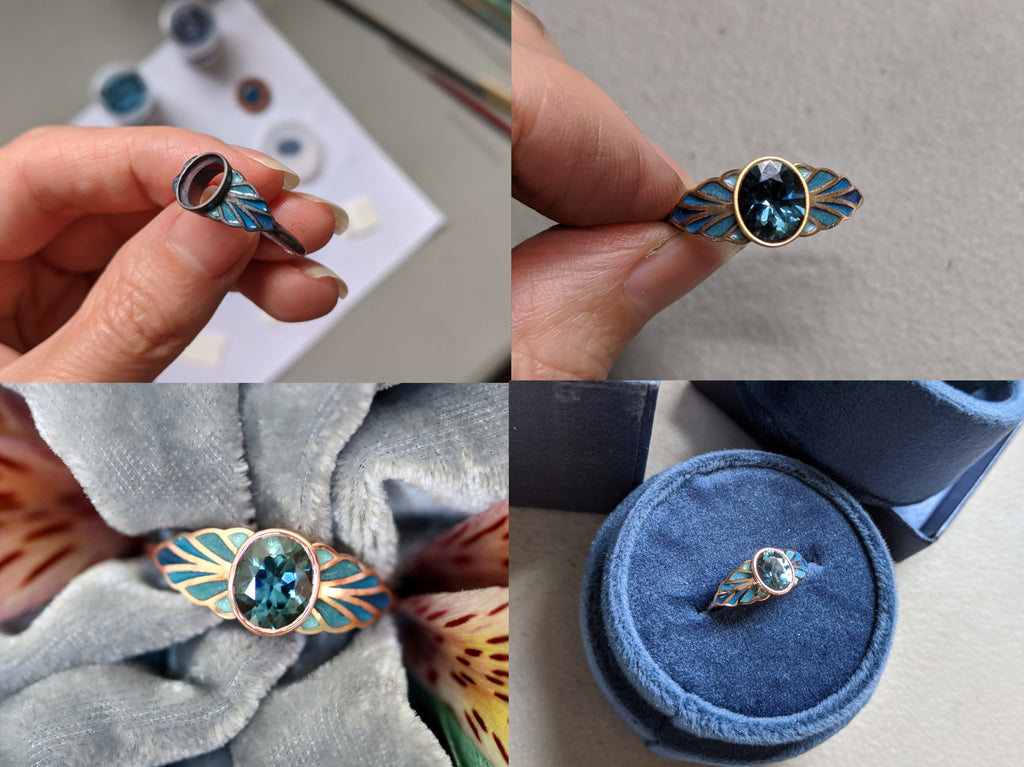
I currently torch fire my enamel. The process only takes about a minute, but I've had to learn how to be very precise, since a few seconds can separate a perfect piece from a big mess where I have to grind enamel out and try again. After the firing, I check the enamel to see what needs to be done--usually I need to do 3-5 firings to get everything as close to perfect as possible.
Stone Setting and Finishing
After the firing, I clean the oxidation off the piece, and set the gemstones. I have to take great care in this step, since striking the enamel with my hammer could damage it. Once the gem is all snuggled in, I polish the piece, clean it, and get it ready for its forever home.